

Planners can be wonderful tools to organize yourself and improve your productivity! Whether you have a busy schedule or not, planners allow you to express and organize yourself in the best way possible. If you want to know more about how to start a planner, this article was made just for you.
Let us slide into your dms 🥰
Get notified of top trending articles like this one every week! (we won't spam you)Step 1: Buy a notebook
For starters, you will need a notebook. There are several options you can choose from. If you're into bullet journaling, a dotted journal is the perfect option for you.
When choosing, make sure to pay attention to the page weight and thickness so that the markers won't bleed through. If you don't want to start a journal on your own, a regular planner is the one for you. Choose the one that best adjusts to your organizational needs. Take into account the type of spreads it offers.
Both of these can be easily found in most stationery stores and online. I recommend seeing reviews on the notebooks you're interested in before buying. After all, this notebook will stick with you for the whole year.

Take the Quiz: Which Outfit Material Best Matches Your Style?
Curious about which fabric suits your fashion vibe? Take this quiz to discover which material is the right one for you!
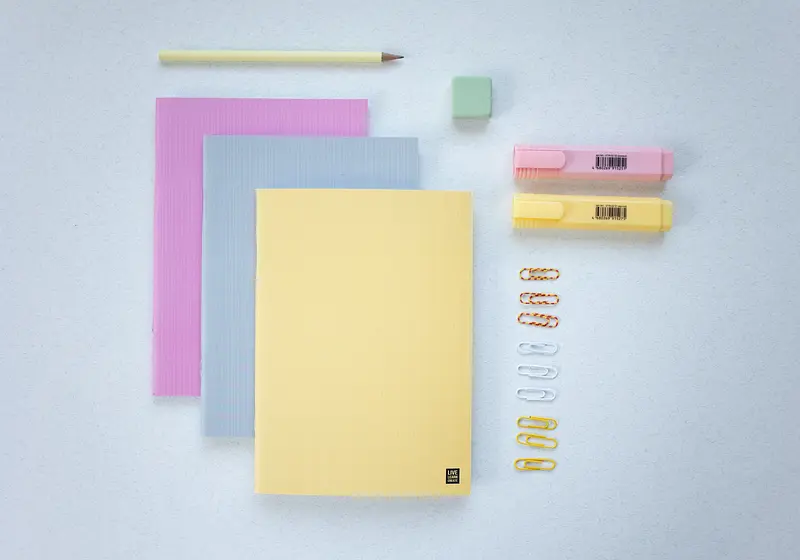
Step 2: Choose stationery supplies
Now that you have your notebook, you will need supplies to write in it. A pen is a planning essential so pick your favorite. In case you are interested in decorating your planner, you may want to get some extra supplies such as markers, brush pens, highlighters, sticky notes and washi tape.
Also, for bullet journaling unless you can seamlessly draw lines like Amanda Rach Lee, a ruler will be a great asset to your pencil case. Keep in mind you do not need expensive supplies to start your planner!
Step 3: Make it unique
One of the best things about a planner is that it can be unique and customized to your taste. With the supplies you've gathered, decorate it and make it your own. Doodle it, highlight texts, put washi tape, etc.
You can find tons of inspiration for planner decor on Pinterest and We Heart It. Your notebook needs to reflect your mind so that you can organize it!
Step 4: Decide how you will use it
The actual organization starts here. From this point on, you need to decide how you will use it, that is, what spreads will be beneficial to you. Do you want to use the monthly calendar?
How often should you check it? What about the weekly pages? What do you want to keep track of?
Ask yourself these questions and decide what you think will work best for you. Don't be scared to make the wrong choice! If you feel your system isn't working, change it until it does.
More examples of questions to ask yourself:
- What is the main thing you'll use your planner for?
- Do you prefer daily pages or weekly pages?
- Do you want to have spreads specifically for school/college/work?
- Do you want to use my planner as a diary as well?
You can also do some quizzes online to help you find your planning system. A good example is the Erin Condren quiz you can find here.
Step 5: Fill in important dates
Now that you have a system to start with, fill your spreads with important dates and reminders. Write in your exam dates, tests, assignments, due dates, birthdays... Anything you must remember write it in! Then build your planner off of these, they will be the base and foundation of your organization.
Step 6: Check it everyday
Being consistent and checking your planner regularly will give you faster results I can assure you. Something I struggled with when I first started planning was doing it every day. So I was never fully organized!
But if you commit to checking your planner every morning to set daily tasks or every night to reflect on the past day for five minutes, you will feel more organized and productive. To help you with this, you can set an alarm clock to remind you. Furthermore, dedicate more time to your journal on weekends and less busy days. Personally, I like to use Sundays for that but feel free to choose the day that works for you.
Step 7: Don't be too hard on yourself
You have to be realistic and know your limits! Sometimes a simpler layout can be more helpful for your organization. Talking from personal experience, when you try too hard to be artsy you miss the point of planning and bullet journaling.
If you decided to give planning a shot, you're probably struggling with time management. Therefore, it should be a supplement rather than a burden. I remember when I first tried bullet journal I gave up just two weeks later because I put too much pressure on the art aspect of it. Working your journal to its full potential can only happen when you balance the organizational and artsy aspects of planning.
Step 8: Take your time
Starting a planner and taking advantage of its benefits may take a while. If you and a friend start at the same time and your friend seems to handle it better, don't stress. Adapting to a new organization method takes time and differs from person to person.
Just be patient with yourself: relax, work hard and become Santa Claus in the meantime! I know it's easier spoken than done but nothing ventured, nothing gained.
Once you've done these steps, have fun with it. Explore different methods! Changing your routine now and then also helps you maintain your productivity.
Keep it dynamic! When you become bored with your routine, you risk falling into procrastination cycles which are super difficult to overcome. So, seek for balance in your life and in your journal. Happy Planning!