Fall is right around the corner and what better way to get in the mood than to do nail-inspired art? Find out 7 design ideas to pumpkin-spice up your nails this fall season. And don't worry, because you don't have to be a nail technician in order to «nail» these patterns. Be ready for an overuse of seasonal puns and the cutest ideas!
Remember that these designs can be used in all nail shapes.
Let us slide into your dms 🥰
Get notified of top trending articles like this one every week! (we won't spam you)The Timeless French Tip
French tip nails are a timeless and simple design that can be adjusted to any season. Therefore, I couldn't leave them out of this article.
It's an easy look to achieve and you can find tons of tutorials on YouTube or TikTok on how to make it even easier. I personally think the sponge tip does the trick. If you don't know what I'm talking about, I'll explain.
In a few words, you take any kind of makeup sponge and put a little bit of nail polish on it. Then, you "squish" your finger into the sponge where you put the polish until you reach your desired length. To turn this technique into a worthy fall look, just use more toned-down colors, such as orange or dark green, and all shades of brown.
You can even play with this style and be as creative as you want by adding thinner lines in different colors, just like in the image below.

Take the Quiz: Which Squid Game Player Are You?
Ever wondered which player you’d be if you found yourself in the Squid Game universe? Take this quiz to find out which character matches your perso...
The Inverse French Tip
A trend that has been popping up lately is the inverse French tip nail. You read it correctly. Instead of having the detail at the tip, you have it at the bottom.
To achieve this look, first layer a clear base on the nail. On top of that, add the desired color, leaving a small oval clear at the bottom. Take the image below as an example. The base doesn't need to be clear necessarily, use whatever color you prefer.
If you're like me and struggle to paint near your cuticles, this may be the style for you since you don't get near them with color. At least in the trickiest part, which is the bottom.
One Pumpkin Swirl, Please
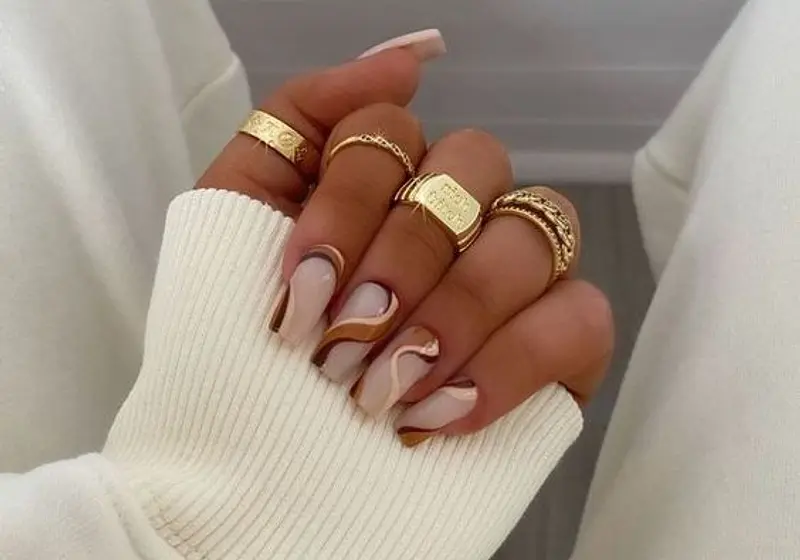
Nail swirls have been trending all year since it's a really easy and achievable look while maintaining class and elegance. Much like the previous technique, this one can be "autumnized" by picking a warmer and more toned-down colour palette with many oranges, yellows, and browns. Depending on how much of a maximalist you are, you can pick how many different colors you'd like for your designs.
There are hundreds of different combinations you can try. Clear background with brown as the accent color, just like the image. A brown background with orange swirls, maybe a few yellow ones too. With the same sponge from before, you can tap different colors onto the nail and create a gradient on top of which you can add brown swirls.
The best part is that you can do this technique with regular nail polish and using supplies as simple as a bobby pin. If you want to feel like a professional though, feel free to buy tiny nail art brushes.
Mother Of Pearls
Euphoria taught us how to put rhinestones everywhere, from our hair to our nails. But rhinestones do not exactly scream fall, do they? That being the case, I've been seeing all over Pinterest people using pearls instead of silver rhinestones.
Sorry, Cassie. We'll stick to pearls this fall season. Combine this style with the French tips and you'll have everyone asking you where you got your nails done.
The great thing about any of these ideas is that you can mix and match however you like and prefer. So you can put pearls on a single nail or on all of them. It's your choice!
BOO!
Thinking of fall is not very different from thinking of Halloween. After all, Halloween happens during Autumn. So, your nails should match the hocus-pocus season.
Remember the swirly nails we just talked about? Yeah, add two black dots to them and call them a ghost. It is that simple.
A little circle with a swirl for the tail and two dots and you have your very own ghost nail art. You can also add an extra swirl in the middle to add arms. Use white nail polish for the ghost and clear or a milky white for the base.
Don't be spooked! Nail art is easier than it looks.
Mummy? Sorry. Mummy? Sorry.
Keeping the Halloween spirit up, another easy creature to replicate on your nails is a mummy. Use the same white you used for the ghosts, but instead of swirls, do strokes all over the nail going in different directions. Those strokes will mimic the linen wrapping the mummy.
To finish off the design, add two black dots for the eyes. See the image below to guide you!
I have one more tip for the maximalist girlies. Use gold nail polish to give that Cleo de Nile from Monster High look. Especially if you dress up as her. That will totally complete your ghoultastic costume.
To Impress Tom Holland
I do believe Tom Holland would love to use this nail art for his Spider-Man movies. Spider webs are really cute for Halloween and easy to make. Take a bobby pin or a thin brush and make a straight line from the middle of the nail which meets at the tip.
Then, make one on each side diagonally meeting at the tip. To finish, connect the lines horizontally with slightly curved lines.
In order to spice up the design, leave a clear space in the shape of a heart or any shape you desire at the tip of the nail, just like in the photo. Or take the pearls from previously and place them in the spots where the lines connect.
Here are 7 nail art ideas to pumpkin spice up your fall as promised. Enjoy the season of pumpkin spice lattes and apple pie with your super aesthetic nails!


