

Now that the Barbie Movie has been out for a couple days, you're probably either reeling from the culture shock that is this iconic movie or… You just haven't watched it yet. If it's the latter, then please go watch it! And if it's the former, then clearly, you all must see what the hype is all about.
Whether you're a first-time watcher or have seen the movie before, you can use these recipes to channel your inner Barbie and snack on food that's on theme to boot. I've curated an epic list of various desserts, drinks, and savory meals that you can try making for your own ultimate watch party menu!
Let us slide into your dms 🥰
Get notified of top trending articles like this one every week! (we won't spam you)Pink Lemonade Cupcakes
For the cupcakes:
- 1 ½ cups all-purpose flour
- 1 ½ teaspoons baking powder
- ¼ teaspoon salt
- ½ cup unsalted butter softened
- 1 cup granulated sugar
- 2 large eggs
- 1 teaspoon vanilla extract
- ½ cup buttermilk
- ¼ cup pink lemonade concentrate (make sure it's thawed if using frozen)
- Zest of one lemon
- Pink food coloring (optional)
For the pink lemonade frosting:
- ½ cup unsalted butter, softened
- 4 cups powdered sugar
- ¼ cup pink lemonade concentrate
- 1-2 tablespoons milk (as needed for desired consistency)
- Lemon slices or pink sprinkles (for garnish, optional)
Directions:
Preheat your oven to 350°F (175°C). Line a cupcake tin with cupcake liners. Whisk together the flour, baking powder, and salt in a medium-sized bowl.
Set aside. In a large mixing bowl, use an electric mixer to cream the softened butter and granulated sugar until light and fluffy. Add the eggs, one at a time, beating well after each addition. Mix in the vanilla extract.
Combine the buttermilk, pink lemonade concentrate, and zest in a separate small bowl. Gradually add the dry ingredients to the butter mixture, alternating with the buttermilk mixture. Start and end with the dry ingredients.
Mix until just combined. Add a few drops of pink food coloring to achieve a pink hue if desired. Divide the cupcake batter evenly among the cupcake liners, filling each one about 2/3 full. Bake the cupcakes in the preheated oven for 15-18 minutes or until a toothpick inserted into the center comes out clean. Remove the cupcakes from the oven and let them cool in the tin for a few minutes before transferring them to a wire rack to cool completely. For the frosting:
In a large mixing bowl, beat the softened butter until creamy and smooth. Gradually add the powdered sugar, one cup at a time, beating well after each addition. Mix in the pink lemonade concentrate until fully incorporated.
If the frosting is too thick, add milk, one tablespoon at a time, until you reach your desired consistency. Once the cupcakes have cooled completely, frost them generously with the pink lemonade frosting.
Optional: Garnish with lemon slices or pink sprinkles for an extra touch of charm.
Enjoy these delightful Pink Lemonade Cupcakes with the refreshing flavors of summer! They're perfect for any Barbie movie-watch party or summer gathering.

Take the Quiz: Are You A Coffee Or Tea Person?
Take this quiz to find out!
Raspberry Sorbet
Ingredients:
- 4 cups fresh or frozen raspberries
- 3/4 cup granulated sugar
- 1/2 cup water
- 2 tablespoons fresh lemon juice
Directions:
In a small saucepan, combine the sugar and water. Heat over medium heat, constantly stirring until the sugar dissolves completely. Once the sugar has dissolved, remove the syrup from the heat and let it cool to room temperature.
In a blender or food processor, puree the raspberries until smooth. You can strain the puree through a fine-mesh sieve to remove the seeds if you prefer a seedless sorbet.
Mix the raspberry puree with the cooled sugar syrup and fresh lemon juice in a large bowl. Stir until well combined. Cover the bowl and refrigerate the mixture for at least 2 hours, allowing the flavors to meld and the mixture to chill thoroughly.
Once the raspberry mixture is chilled, pour it into an ice cream maker and churn according to the manufacturer's instructions. This process usually takes around 20-25 minutes, but the time may vary based on your specific ice cream maker. Transfer the churned sorbet into an airtight container and freeze for an additional 2-4 hours to firm up before serving. When ready to serve, scoop the raspberry sorbet into bowls or cones, and enjoy the refreshing burst of fruity goodness!
Note: If you don't have an ice cream maker, you can pour the raspberry mixture into a shallow dish and place it in the freezer. Every 30 minutes, take the dish out and stir the mixture with a fork to break up any ice crystals until the sorbet reaches the desired consistency.
Pink Pasta Salad
Ingredients:
- 8 ounces (225g) of pink-colored pasta (such as beetroot or tomato-infused pasta)
- 1 cup cherry tomatoes, halved
- 1 cup cucumber, diced
- 1/2 cup red bell pepper, diced
- 1/4 cup red onion, finely chopped
- 1/4 cup black olives, sliced
- 1/4 cup crumbled feta cheese
- 1/4 cup fresh basil leaves, chopped
- 1/4 cup balsamic vinaigrette dressing
- Salt and pepper to taste
Directions:
Cook the pink-colored pasta according to the package instructions until it reaches the desired tenderness. Drain and rinse the pasta under cold water to cool it down and stop the cooking process. Combine the cooked pasta, cherry tomatoes, cucumber, red bell pepper, red onion, black olives, and crumbled feta cheese in a large mixing bowl. Drizzle the balsamic vinaigrette dressing over the salad and gently toss everything together until the ingredients are evenly coated.
Season the pasta salad with salt and pepper to taste, and add more dressing if desired. Cover the bowl with plastic wrap or a lid and refrigerate the pasta salad for at least 30 minutes to allow the flavors to meld together. Just before serving, sprinkle the chopped fresh basil leaves over the top of the pasta salad for a burst of herbaceous flavor and a pop of green that complements the pink tones.
Serve the pink pasta salad chilled as a delightful, vibrant side dish or a refreshing main meal option. Enjoy its eye-catching appearance and delicious taste while watching Barbie's exciting adventures!
Note: Feel free to customize this recipe with your favorite veggies or add grilled chicken or shrimp to make it a heartier meal. The pink-colored pasta will add a playful and unique touch to your pasta salad, making it a perfect addition to any Barbie-themed gathering or a fun and colorful dish to enjoy during summer get-togethers.
Hibiscus Iced Tea
Ingredients:
- 1 cup dried hibiscus flowers (also known as sorrel or roselle)
- 4 cups water
- 1/4 cup honey or sugar (adjust to your desired sweetness)
- 1 cinnamon stick (optional)
- 1-2 slices of fresh ginger (optional)
- Ice cubes
- Fresh mint leaves (for garnish, optional)
- Lemon or lime wedges (for garnish, optional)
Directions:
In a medium-sized saucepan, bring 4 cups of water to a boil. Once the water is boiling, add the dried hibiscus flowers, cinnamon stick (if using), and fresh ginger (if using). Reduce the heat to low and let the mixture simmer for about 10 minutes.
After simmering, remove the saucepan from the heat and let the hibiscus tea steep for an additional 5 minutes. This will allow the flavors to infuse thoroughly. Strain the tea into a heatproof pitcher, discarding the hibiscus flowers, cinnamon stick, and ginger slices. While the tea is still warm, stir in the honey or sugar until it dissolves completely. Adjust the sweetness according to your preference. Let the hibiscus tea cool to room temperature, and then refrigerate it until chilled. To serve, fill glasses with ice cubes and pour the chilled hibiscus tea over the ice. Garnish the iced tea with fresh mint leaves and lemon or lime wedges, if desired. Give the tea a gentle stir, and your refreshing Hibiscus Iced Tea is ready to enjoy!
Note: You can also get creative by adding other fruits like orange slices or berries to the tea for additional flavors and a burst of color.
Rosemary Raspberry Chicken
Ingredients:
- 4 boneless, skinless chicken breasts
- 1 cup fresh raspberries
- 2 tablespoons balsamic vinegar
- 2 tablespoons honey
- 2 tablespoons olive oil
- 2 cloves garlic, minced
- 1 tablespoon fresh rosemary, chopped
- 1/2 teaspoon salt
- 1/4 teaspoon black pepper
Instructions:
In a small bowl, mash the fresh raspberries with a fork until they turn into a chunky sauce-like consistency. Add balsamic vinegar, honey, olive oil, minced garlic, chopped rosemary, salt, and black pepper to the mashed raspberries. Mix everything together until well combined.
Place the chicken breasts in a shallow dish or a resealable plastic bag. Pour the raspberry marinade over the chicken, ensuring each piece is thoroughly coated. Marinate the chicken in the refrigerator for at least 1 hour, or preferably overnight, to allow the flavors to meld. Preheat your grill or stovetop grill pan over medium-high heat. If using an outdoor grill, lightly oil the grates to prevent sticking.
Remove the chicken from the marinade, allowing any excess to drip off, and place the chicken on the grill. Discard the remaining marinade. Grill the chicken for about 6-7 minutes per side or until it's cooked through and no longer pink in the center.
The internal temperature should reach 165°F (74°C). Once cooked, transfer the grilled chicken to a serving platter and let it rest for a couple of minutes. Optionally, you can garnish the chicken with a few fresh rosemary sprigs and additional raspberries for a beautiful presentation. Serve the Rosemary Raspberry Chicken with your favorite sides, such as roasted vegetables, mashed potatoes, or a crisp salad. Enjoy the delightful combination of juicy chicken infused with the sweet and tangy raspberries and aromatic rosemary flavors!
Note: I promise that the chicken will look more "pink" once you add more sauce on top of it compared to the photo.
Pink Sushi Rolls
Ingredients:
- 2 cups sushi rice
- 2 1/2 cups water
- 1/4 cup rice vinegar
- 2 tablespoons sugar
- 1 teaspoon salt
- 2 sheets nori (seaweed)
- 1 small cooked beetroot, thinly sliced
- 1 ripe avocado, thinly sliced
- 1/2 cucumber, julienned
- Pickled ginger, for serving
- Wasabi, for serving
- Soy sauce for serving
Instructions:
Rinse the sushi rice in a fine-mesh sieve under cold water until the water runs clear. Drain well. In a medium saucepan, combine the rinsed rice and water.
Bring to a boil over medium-high heat. Reduce the heat to low, cover, and simmer for 15-18 minutes or until the rice is tender and the water is absorbed. In a small bowl, mix together the rice vinegar, sugar, and salt until the sugar and salt dissolve. Once the rice is cooked, transfer it to a large wooden or glass bowl. Drizzle the vinegar mixture over the rice, gently folding it in with a spatula or rice paddle. Be careful not to mash the rice. Let the rice cool to room temperature.
Place a bamboo sushi rolling mat on a clean surface. Lay a sheet of plastic wrap over the mat. Lay one nori sheet on top of the plastic wrap with the rough side facing up.
Wet your hands to prevent the rice from sticking, and take a handful of sushi rice. Spread it evenly over the nori, leaving about 1 inch of the nori sheet uncovered at the top. Lay a few slices of beetroot, avocado, and cucumber horizontally across the center of the rice. Carefully lift the edge of the bamboo mat closest to you, and start rolling the sushi away from you, using gentle pressure to shape it into a tight cylinder. Make sure the uncovered nori edge at the top seals the roll. Remove the bamboo mat and set the roll aside. Repeat the process with the remaining nori sheet, rice, and fillings. With a sharp knife dipped in water, slice each sushi roll into 6-8 bite-sized pieces. For dipping, serve the pink sushi rolls with pickled ginger, wasabi, and soy sauce on the side. Enjoy!
Note: You can also add other fillings of your choice, such as cucumber, shrimp, salmon, mango, or tempura-fried sweet potato, to customize your pink sushi rolls.
Smoked Salmon Canapes
Ingredients:
- 12 slices of baguette or cocktail rye bread
- 4 ounces (about 113 grams) of smoked salmon, thinly sliced
- 4 ounces (about 113 grams) of cream cheese, softened
- 1 tablespoon fresh dill, chopped
- 1 tablespoon capers
- 1 small red onion, thinly sliced
- Freshly ground black pepper, to taste
- Lemon wedges, for serving (optional)
Directions:
Preheat your oven to 350°F (175°C). Arrange the slices of baguette or rye bread on a baking sheet and toast them in the oven until they are lightly golden and crispy. Remove from the oven and let them cool slightly.
Mix the softened cream cheese with the chopped fresh dill in a small bowl until well combined. Spread a thin layer of the dill cream cheese mixture on each slice of toasted bread.
Next, place a slice of smoked salmon on top of the cream cheese layer on each bread slice. Sprinkle some capers over the smoked salmon and add a few thin slices of red onion on top. Add a dash of freshly ground black pepper to taste for some extra flavor.
Arrange the finished smoked salmon canapes on a serving platter and garnish with additional dill, if desired. If you prefer a touch of brightness, serve the canapes with lemon wedges on the side for guests to squeeze over their canapes before enjoying.
These delightful smoked salmon canapes make for an elegant and tasty appetizer at any gathering or party. The combination of creamy dill-infused cream cheese, smoky salmon, tangy capers, and zesty red onions on crisp bread creates a perfect balance of flavors and textures. Enjoy them with friends and family as a delightful start to any meal or as a sophisticated addition to your appetizer spread.
Barbie's Berry Fizz
Ingredients:
- 1 cup fresh mixed berries (strawberries, raspberries, blueberries, blackberries)
- 2 tablespoons sugar (adjust to taste)
- 1 cup sparkling water or soda water
- 1 cup lemonade (store-bought or homemade)
- Ice cubes
- Fresh mint leaves (for garnish)
- Lemon slices (for garnish)
Directions:
In a blender, combine the fresh mixed berries and sugar. Blend until the berries are pureed and the sugar is fully dissolved. You can strain the berry puree to remove any seeds if you prefer a smoother texture.
In a pitcher, combine the berry puree, sparkling water, and lemonade. Stir well to mix all the ingredients thoroughly. Add ice cubes to serving glasses to chill them. Pour the Barbie's Berry Fizz mixture over the ice in each glass, leaving some room at the top. Garnish each glass with a sprig of fresh mint and a lemon slice for an extra touch of elegance. Serve immediately and enjoy your delightful Barbie-inspired berry fizz!
Strawberry Yogurt Dip
Ingredients:
- 1 cup plain yogurt (Greek yogurt or regular yogurt, depending on your preference)
- 1 cup fresh strawberries, diced
- 2 tablespoons honey (adjust to taste)
- 1/2 teaspoon vanilla extract
Directions:
Combine the plain yogurt, diced strawberries, honey, and vanilla extract in a medium-sized mixing bowl. Using a spoon or a hand blender, blend the ingredients together until you achieve a smooth and creamy consistency. Make sure the strawberries are well incorporated into the yogurt.
Taste the dip and adjust the sweetness by adding more honey if desired. You can also add more diced strawberries for extra texture. Transfer the strawberry yogurt dip to a serving bowl. Optional: Garnish the dip with a few strawberry slices on top for a decorative touch.
Chill the dip in the refrigerator for at least 30 minutes before serving to enhance the flavors and let the dip thicken slightly. Serve the strawberry yogurt dip with an array of fresh fruits, such as sliced apples, bananas, grapes, or pretzels. It also goes well with graham crackers or vanilla wafers for a sweet treat.
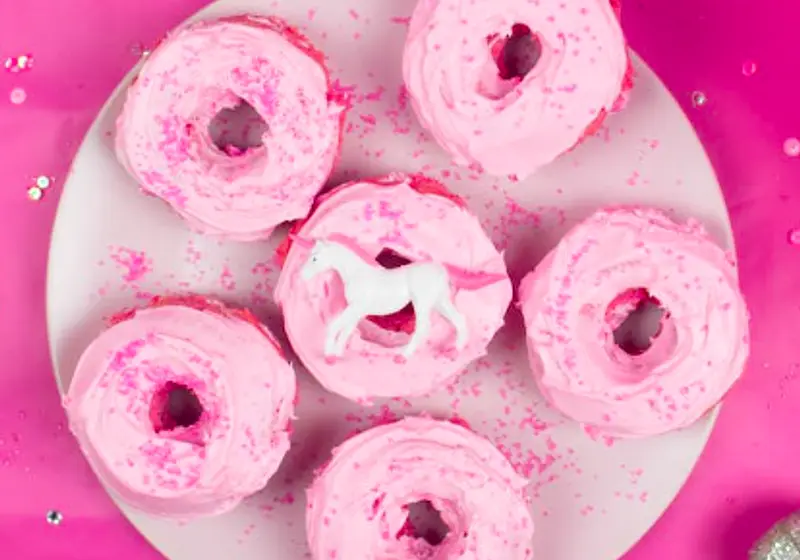
Pink Velvet Sugar Cookies
Ingredients:
- 1 cup unsalted butter, softened
- 1 ½ cups granulated sugar
- 2 large eggs
- 1 teaspoon vanilla extract
- 1 teaspoon baking powder
- 1 teaspoon baking soda
- ½ teaspoon salt
- 3 ½ cups all-purpose flour
- 1 tablespoon unsweetened cocoa powder
- Pink gel food coloring
Instructions:
Preheat your oven to 350°F (175°C) and line a baking sheet with parchment paper. In a large mixing bowl, cream together the softened butter and granulated sugar until light and fluffy. Beat in the eggs, one at a time, followed by the vanilla extract, mixing well after each addition.
Whisk together the baking powder, baking soda, salt, and all-purpose flour in a separate bowl. Gradually add the dry ingredients to the wet ingredients and mix until a soft dough forms.
Divide the dough into two equal portions. Leave one portion as is and add a few drops of pink gel food coloring to the other portion. Mix until the color is evenly distributed, and the dough turns pink.
Taking a small piece of each dough, roll them together into a ball to create a marbled effect. Place the dough balls on the prepared baking sheet, leaving some space between them. Gently flatten each dough ball with the back of a spoon or your fingertips. Bake the cookies in the preheated oven for about 8-10 minutes, or until the edges are lightly golden. Remove the cookies from the oven and let them cool on the baking sheet for a couple of minutes before transferring them to a wire rack to cool completely.
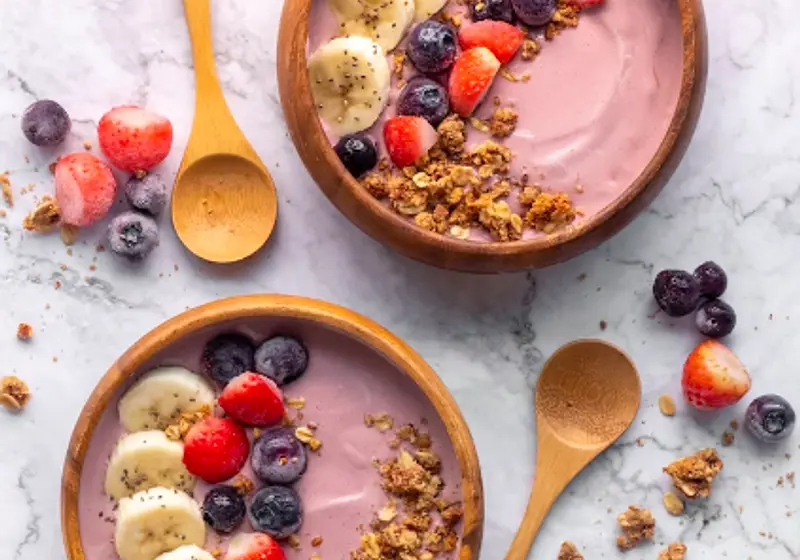
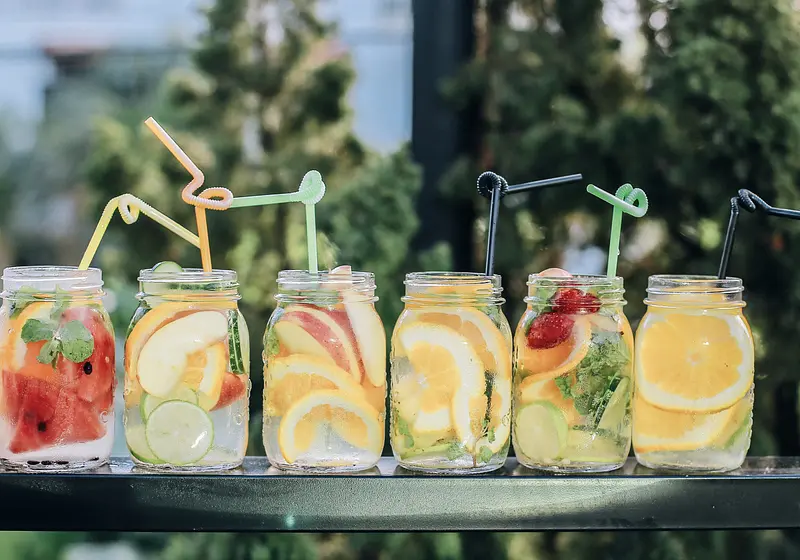
Each dish exudes a touch of glam and a whole lot of pink, guaranteed to elevate your culinary experience to new heights of fun and elegance. Imagine sipping on bright, summery beverages by Barbie's Dream Pool deck, embracing the sun-kissed vibes and the carefree spirit of Malibu beach vacations. So, get ready to add a burst of pink and a dash of excitement to your culinary escapades, as we embark on this Barbie-inspired journey.
Let the flavors and colors transport you to a world of endless possibilities, laughter, and joy. After all, Barbie's spirit lives within all of us, and what better way to celebrate than with these delectable, vibrant recipes. Cheers to a summer filled with glam, pink, and unforgettable moments!